In Part 1 of We Walkthrough Workflow Without Worry, we talked about workflow and how it improves process efficiency and errors. We looked at tools and the thought process of designing or re-designing processes to work with workflow. Now we are going to peel back the hood of Acumatica a bit and get into the technical implementation with a how to guide to achieve some of these items.

-Approval Request - Sends email to the Approver
-Rejection Notifications
-Approval Notifications
-Parts arrived on Dock Notification (Fed ex, UPS etc.)
-Receipt into QA Notification
-Movement from QA to Stock Notification
-Tasks for rejected Bills to notify Purchasing
-PO Transmittal - Sends PO via to vendor
-Automated click back to sign acceptance of the PO
-Carrier Pick Ups for Shipments
-Notify Customers of Backorders, Shipments, Airwaybills
-When it’s Bad to use Automation Notifications
-For Routine or Day-to-day tasks better suited to work lists or dashboards
-Users complain about getting too many emails
-Emails sent to more than just the next actor in a process
We have talked about this subject a few times on the site here is a link to a video going in depth on how to do it.
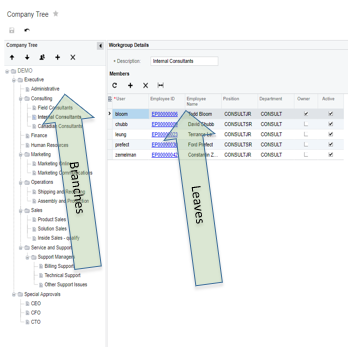
Acumatica is built around the concept of Owners and Workgroups. Nearly every transactional record in Acumatica contains the Workgroup and Owner field. The idea being that the owner of a record could be changed throughout the process and life of the record. This is best seen in the CRM but the core concept applies across the entire system.
The company tree is the sum total of all individuals and workgroups that own records. The company tree branches into workgroups. The company tree terminates into leaves at the individual level. The company tree in the map showing the company hierarchy as well as controlling the selection boxes in the individual records.
The Workgroup represents a team that would perform a function. Ex. Collections, Sales, Support Team, Marketing, Controller. Individuals can below to one or more workgroups. Workgroups can contain one to may individuals. Workgroups can contain workgroups. For example, support team level 1 and support team level 2 could belong to the workgroup support team.
When an individual member from a workgroup is assigned to a record this is called an owner.
An example of this is the life of a sales order and subsequent documents:
-Workgroup: Sales
-Owner: Salesperson creating
-Workgroup: Purchasing
-Owner: Purchaser responsible for gathering due dates
-Workgroup: Sales Follow-Up
-Owner: Salesperson responsible for communicating dates to customer
-Workgroup: Purchasing
-Owner: Purchaser responsible for gathering due dates
--Alt Supervisor
-Workgroup: Warehouse Expediting
-Owner: Assigned Resource
-None assignee transfers to Shipping Documents
-Workgroup: Pickers
-Owner: Assigned Resource
-Workgroup: Packers
-Owner: Assigned Resource
-None assignee transfers to Invoice
-Workgroup: AR
-Assignee: By AR for customer
-Workgroup: Collections
-Assignee: By Region, Customer etc.
So far, we have talked about manually transitioning owners and workgroups at different stages. Acumatica also contains Assignment maps. Assignment maps are Acumatica’s way of defining rules that control who owns a record, i.e. work, a transaction or a document and applying these rules automatically when their conditions are met. Rules can be simple assigning all records to one person or complex considering multiple fields and conditions. If the conditions of a rule are true, the assigned workgroup and/or owner are entered into the document. If the condition of a rule is false, the next rule is checked until all rules checked. Due to this it is a good idea to have a catch all rule for exceptions or a way to monitor via dashboard or worklist for unassigned documents. In addition, the assignment map also has a wait time. If this wait time is exceeded without activity being recorded, then the assignment map can escalate to the next workgroup up the chain.
Approval maps are a special type of Assignment Map that stop further processing of a document until a approval or rejection is recorded. All the same functionality of rules and assignments apply here except we are assigning an approver and not an owner.
Adding approvals to a process is a good example of can vs. should. Approvals add bureaucracy and can bottleneck a process or cause single points of failure. They should be used when there is a regulatory requirement or if the risk outweighs the cost of delay. A good alternative is to use departmental dashboards to monitor cost and/or exposure.
The keys to success when using Approval Maps:
-Require Approval only on what’s needed
-Have good wingman policies for when an approver is unavailable
-Both to the Approver and the Requester
-Notify on Approval and Rejection
-Have a rejection reason so the requester knows next steps
-Less delays for re-work or debate on why was rejected
Speed up data entry by using these two Acumatica features.
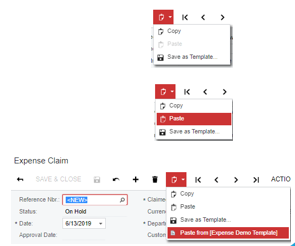
Copy, copies the contents of a transaction. You then create a new transaction and use the paste feature to create an duplicate with a new transaction number. This feature is available to anyone with edit access to a screen and available in almost every Acumatica transactional or master data screen. Also, before saving the new transaction an user can edit its contents removing or adding lines or information. This very handy for orders/transactions that could need to be duplicated in the future.
Templates work exactly like copy except for that they are saved and selectable from the drop-down menu going forward. Both these items are great for recurring work or on the fly rework where duplicating a document and then correcting are required.
Tip 4 – Import/Export Buttons
Available on many transactions containing detail records and all generic inquiries the Export to excel button lets you quickly export the contents.

Available on many transactions containing detail records in the Import from excel button.

This allows you to take the exported excel sheet that you may have made changes to as a template for the same or a different transaction. You then import from that excel sheet with a series of options
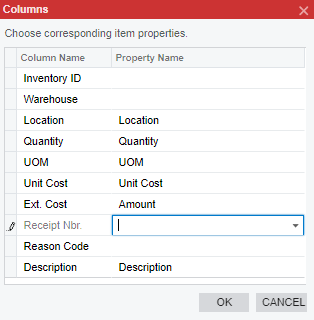

One of my favorite tricks with this functionality is to export a big journal entry re-label the credit column as debit and the debit column as credit and then use the import to bring in the lines of my reversing entry.
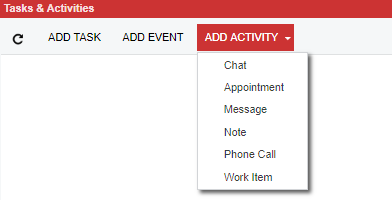
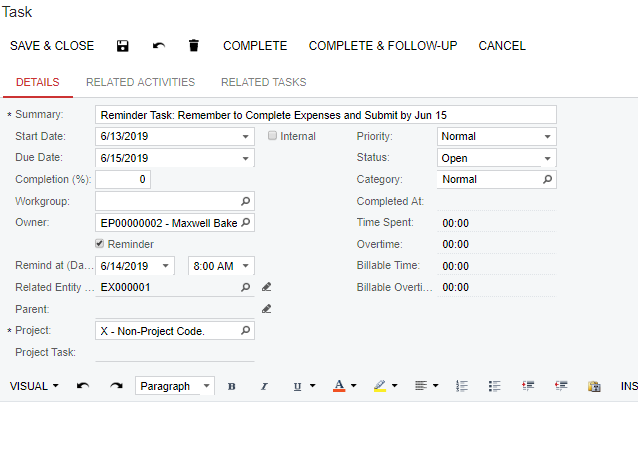
-Assign to Yourself or Others
-Set Reminders to receive notification
-Assigned to Entity (ex Expense Claim)
-Complete & Follow Up to chain Tasks together
-Relate to Other Tasks or Activities
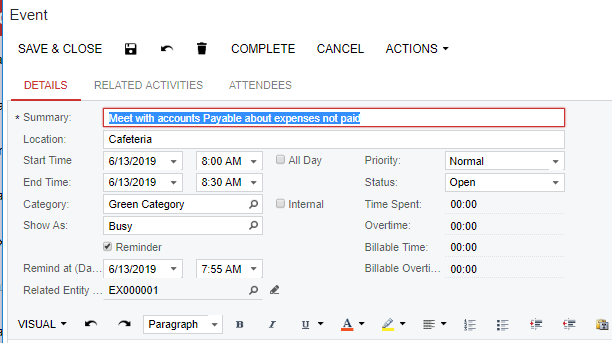
-Like a Calendar Event or Meeting in Outlook
-Can be Synced via Exchange Integration
-Invite Multiple Participants
-Relate to a Task or Activity
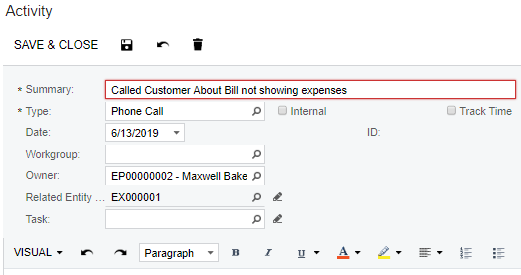
-Track Communication
-History of a Record
-Relate to a Task or Event
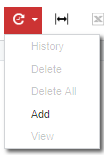
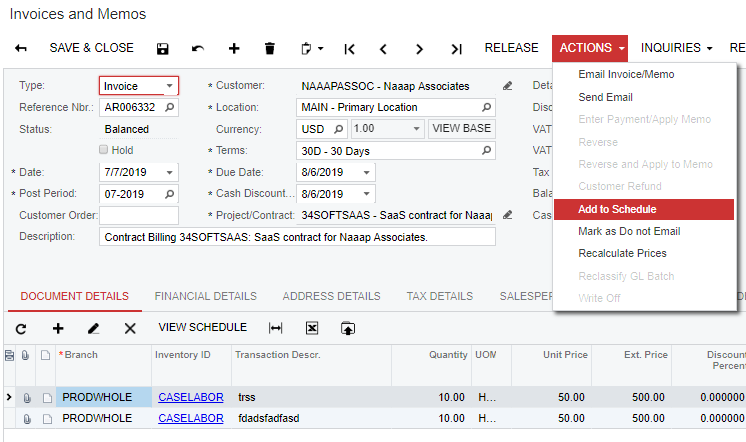
The purpose of Automation schedules is to set criteria or conditions on which Mass Transactions will run. This is accessed via the Schedule Icon which looks like a refresh icon with clock hands inside of it. We define the frequency and conditions under which the action occurs.
The example below showings releasing expense claims to accounting monthly if those documents are created by the user and are in an approved status.
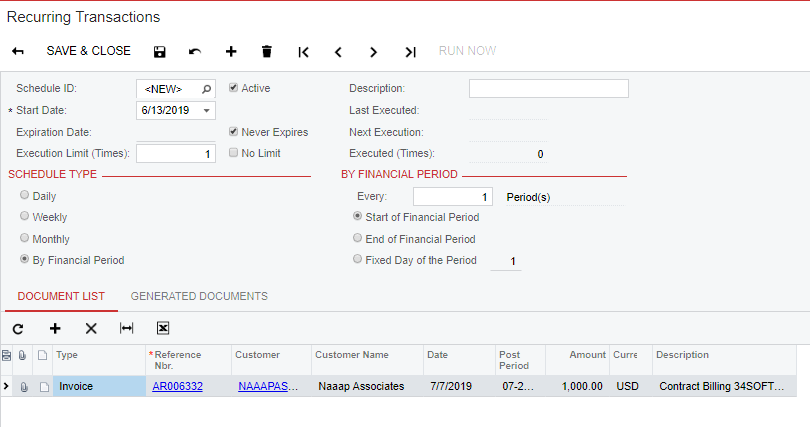
Recurring transactions are a type of Automation schedule that creates a new document based on a template. The document types available for this are Journal Entries, AP Bills, and AR Invoices. This is good for paying monthly expenses like rent. Examples include Set Up Monthly Bills to auto generate,
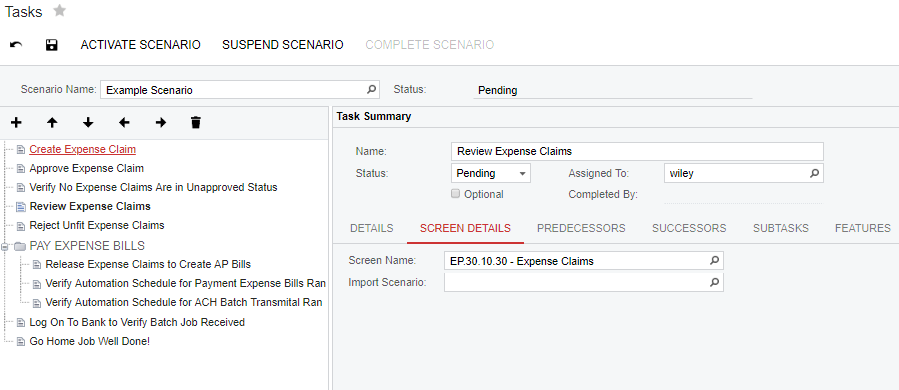
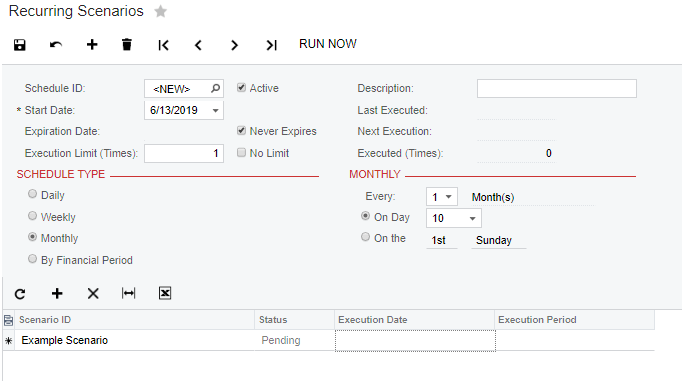
Set Up Daily Journal Entries to create and release, Set Up a Monthly Rental Invoice for a tool or loaner part.Another version of the recurring transaction is called Recurring Scenarios. Recurring Scenarios are a series of tasks released by the system. They leverage the Automation Schedule Functionality. In the details section you define work instructions for the steps. In the Screen Details section, you place Links to the Screen needed for the Task or even a Link to an Import Scenario to Upload data to the system. Tasks are scheduled to run in Series or Parallel and can be set as interdependent or Independent of completion of the others.
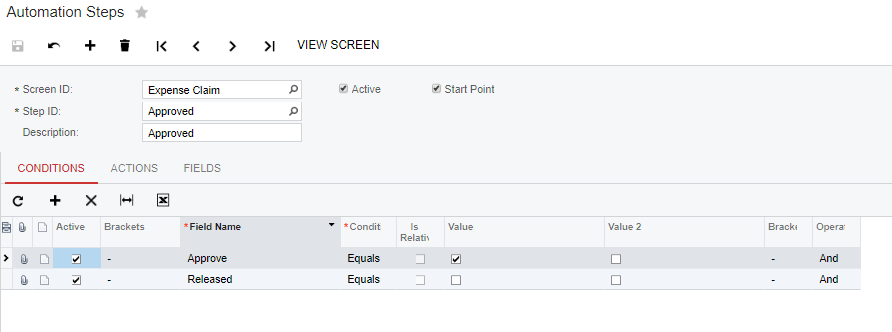
Automation steps allow you to Poka-yoke the screens by controlling the UI screen during changes in the State of a Record.
-Enable/Disable Allowed Actions
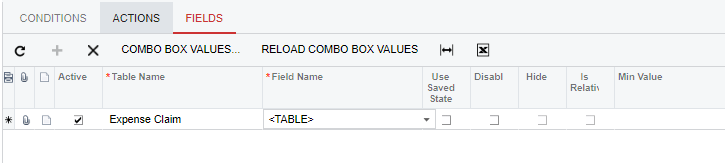
-Enable/Disable/Hide Fields
-Set Data On Transition between States
-Define which conditions define the states
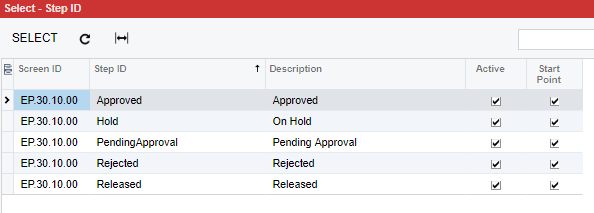
-Add new states or edit the existing one
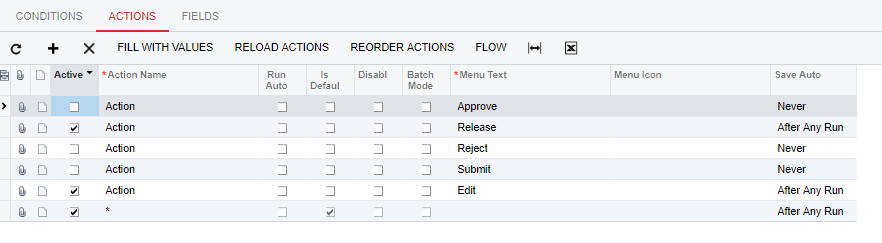
-The * Action Sets Data to a value on Save of this State
In this example we look at the Approved State. The approved state exists when the approval field is set true, but the released field state is set to false. The actions approve, reject and submit are unavailable on the menu and will appear grayed out. The actions Release, Edit and * are active and are usable from the actions menu. In addition, when this state is reached the * action sets the Status to Approved. On the fields tab no fields are disabled when in this state beyond those in the baseline code.

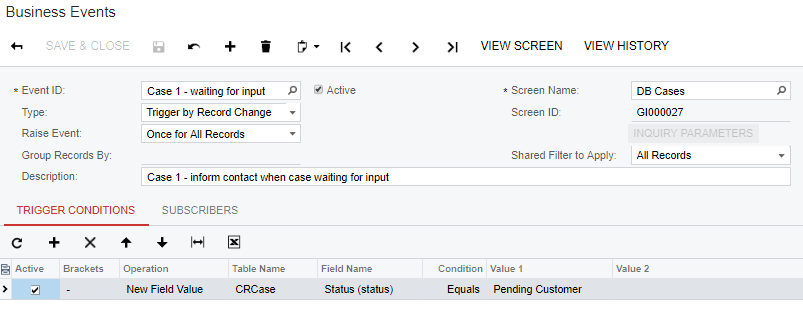
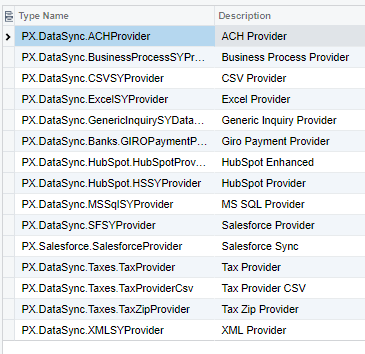
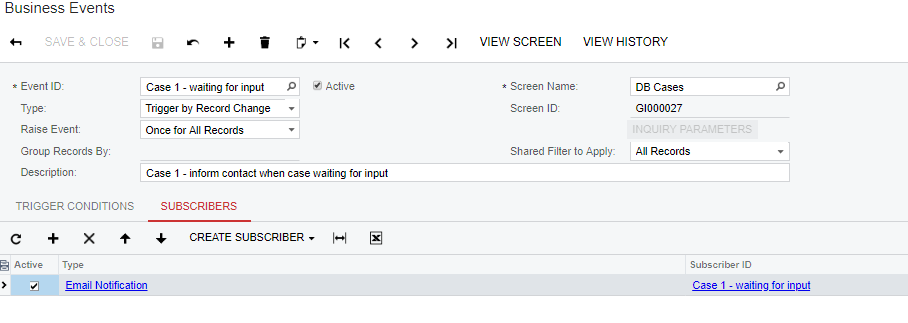
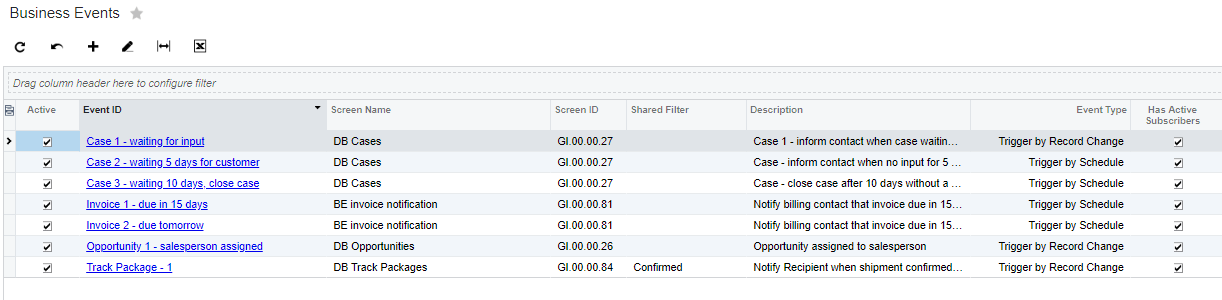
Business events are the Newest Addition in Acumatica and are available from 2018R1 and later. They trigger by a Condition monitoring a Generic Inquiry, or Trigger on a Schedule. They can send an Email Notification or Send a Mobile Notification to the app on iPhone/iPad or Android Devices. They can also Trigger an Import Scenario to upload data via a built in Provider for external data or use a Generic Inquiry as the internal data source for import scenario. This latter is a very powerful tool in manipulating data based on source data in the system.
In the example below, an email notification is sent to a customer when the Case is set to Pending Customer Response using the notification template Case 1 – inform contact when case waiting for input.
To recap, Acumatica comes with a ton of out of the box tools to help you implement Automation and Workflows. The above tips will help you get started and CS3 Technology is always here to support your Workflow both from a process design and improvement resource as well as a technology support team. In addition, CS3 is experienced with the more complex world of customization items below. So as we love to say don’t suffer in silence and reach out to your consultant team or sales if we can assist in any way.

-Program in C# with the .NET Framework
-Enhance pages with built in JavaScript
-Built in Import & Export Scenarios
-Built in Integration with 3rd party apps
-Power BI, OData to Excel and Power Query, Data Self powered by Tableau
-B2B, B2C or Website integrations
-Get your customers and vendors enter data
-Communicate internally and externally
--Twilio
--Slack
-C# and MS Visual Studios


